
Introduction
If inlay is the art of assembling tiny puzzle pieces, then choosing the right materials is your first—and most crucial—step. Just as a painter selects pigments, an inlay artist must understand woods, veneers, and dyes to achieve vibrant contrasts, harmonious color stories, and lasting durability. In this post, we’ll explore everything from exotic hardwoods to contemporary laminates, and reveal how grain orientation and surface treatments can turn a simple design into a jaw-dropping statement.
1. Exotic Hardwoods: Nature’s Palette
The backbone of any inlay project starts with selecting solid woods and thin veneers that offer dramatic tonal contrasts:
-
Ebony: Jet-black and nearly streak-free, ebony veneers provide the deepest possible contrast against light woods.
-
Rosewood: Ranging from chocolate browns to purplish streaks, rosewood adds warmth and an organic, luxurious feel.
-
Padauk & Bloodwood: Vivid reds straight from the tropics—perfect for highlighting focal points or creating floral motifs.
-
Purpleheart: Deep violet hues that develop richer tones with exposure to light. Use sparingly for accent details.
Tip: Always source ethically harvested or reclaimed hardwoods. Look for Forest Stewardship Council (FSC) certification or local salvaging operations to keep your carbon footprint low.
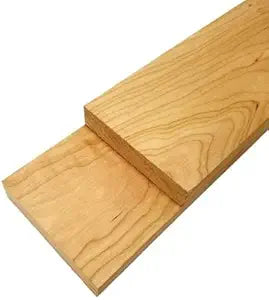
2. Veneers vs. Solid Stock
While solid boards are great for structural components, inlay relies on veneers:
-
Bookmatched Veneers: Sliced sheets opened like a book create mirror-image grains—ideal for symmetrical patterns.
-
Rotary & Sliced Veneers: Rotary-cut gives broad, wild grain; plain-sliced produces straight, cathedral patterns. Choose based on whether you want dramatic movement or a calm backdrop.
-
Engineered Laminates: These are thin layers of real wood bonded over plywood or MDF. They’re uniform, stable, and budget-friendly—but sometimes lack the depth of genuine veneers.
Tip: For hobbyists just starting out, pre-glued veneer tapes and iron-on sheets make application foolproof. They come in a range of species at a fraction of the cost.
3. Dyes and Stains: Expanding Your Spectrum
Natural wood shades are stunning, but dyes unlock colors beyond the native palette:
-
Transparent Aniline Dyes: Penetrate deeply without obscuring grain. Available in vibrant hues—blues, greens, and even purples that no wood delivers naturally.
-
Water-Based Stains: Easier cleanup and less odor; ideal for workshop environments. They tend to raise the grain slightly, so plan to sand between coats.
-
Alcohol-Based Dyes: Dry quickly and soak in uniformly; perfect for sharp, vivid inlays that require fast turnaround.
Tip: Test any dye or stain on scrap veneer before using it on your final piece. Grain density can affect absorption, leading to unexpected light or dark patches.
4. Grain Direction & Contrast
Color alone won’t make an inlay pop—you need grain contrast too:
-
Cross-Grain Pairing
A stripe of maple laid perpendicular to walnut emphasizes the “pinstripe” effect, catching light differently and drawing the eye. -
Bookmatch vs. Slipmatch
-
Bookmatch mirrors adjacent panels for symmetry.
-
Slipmatch repeats the same sequence without flipping sheets, creating flowing patterns across multiple panels.
-
-
Figured & Spalted Woods
Highly figured maple (curly, quilted) and spalted beech introduce natural patterns that can serve as backgrounds or focal areas in small inlays like wallet panels.
5. Combining Modern Laminates
For ultimate consistency and strength, modern hobbyists often blend traditional veneers with man-made laminates:
-
Plywood & MDF Cores
Stable substrates that resist warping. Veneers glued to these create rigid “sandwiches” perfect for thin objects like card wallets. -
Resin-Infused Sheets
Resin-reinforced veneers resist moisture and abrasion—ideal for frequently handled items. -
Printed Wood Textures
High-resolution photographic prints on wood veneer mimic exotic grains at a fraction of the cost. Pair printed “zebrawood” with real walnut for theatrical contrast.
Bringing It Home: Material Shopping List
-
Starter Pack: Pre-glued veneer sheets (walnut, maple, ebony) + a small bottle of transparent dye.
-
Tools: Veneer saw or sharp hobby knife, veneer scraper, and T-bar roller.
-
Finishes: Sanding sealer + a thin wipe-on polyurethane for durability.
Call to Action
Ready to experiment? Share a photo of your material lineup or first test cuts on Instagram with #InlayMaterials and tag a fellow maker who’d appreciate these tips. And if you’re inspired to dive deeper, consider supporting artisans who mill their own veneers or hand-craft exotic hardwood kits—your patronage keeps this rich tradition alive from forest to workshop.